p.s. I hope you all have a wonderful Friday whether or not you celebrate Valentine's Day. Even if you are in a relationship, let's face it, the best part of V-day is actually the day after when all of the candy goes on sale :)

Showing posts with label eye tutorial. Show all posts
Showing posts with label eye tutorial. Show all posts
Thursday, February 13, 2014
Smoky Eyes ♥ Valentine's Day Tutorial
p.s. I hope you all have a wonderful Friday whether or not you celebrate Valentine's Day. Even if you are in a relationship, let's face it, the best part of V-day is actually the day after when all of the candy goes on sale :)

Friday, September 20, 2013
Rusted Over : Eye Tutorial

I know that I've done a lot of red toned eye makeup tutorials over the last few weeks, so after this one, I'm definitely going to take a little bit of a break from the red and venture into other colors for you guys. However, with Fall (or Autumn) just around the corner, I decided that this might be the perfect eye look to welcome it!

As per usual, prime those eyes. I'm using NARS Smudgeproof Eyeshadow base.

I took a cream colored shimmery base and applied it all over my lid and all the way up to the brow bone. I also took a bit and smudged it into my tear duct. I used Maybelline Color Tattoo in Barely Branded.

I used Stila eyeshadow in Terracotta and applied it to the outer half of my eyelid.

And blended it out.

And brought it under the outer corner of my eye.

And then went under my eye with a shimmery taupe shade to help bring a little bit more definition. I also worked this into the crease a bit, which is hard to see, but it is there!


And then tightlined and added mascara to the top and bottom lashes.

And topped it off with a warm toned, basic pink on my lips.
Quick and easy! If you have questions or comments, let me know down below!
Tuesday, September 3, 2013
Shiro Cosmetics : Eye Tutorial

If you follow me on Facebook or Twitter, you would know that I purchased some Shiro Cosmetics eye shadow samples about two weeks ago. After thinking about it for a few days, I decided that I wanted to press the shadows to make them easier to use and I decided to test out my finished product this morning.

I pressed 4 shadows last night and use three of them for this look; those being Sweet Honey (top), Unforgettable (right), and Chimera (bottom). The fourth shade is Steve and I haven't used it yet, but it swatches beautifully. Now, on to the look!

Blank canvas. My skin and I are still not getting along very well...

Much better! I used my Jouer Matte Moisture Tint, Maybelline Instant Age Rewind Dark Circle Eraser, and L'Oréal True Match Super Blendable powder.

Prime those lids! I pressed my shadows, but they came to me loose. If I had chosen to use them loose, I would be using a primer and a base, such as NYX Jumbo Eye Pencil in Milk. The pressing makes them much more manageable, but you do have to work a little bit harder to get the color as dense as when you use them loose. In the end, it all comes down to preference.

Using a small shadow brush, I applied Unforgettable over most of my lid. I avoided the tear duct and the outermost corner.

Using a Sephora Crease Brush, I applied Chimera to the outer corner and completely along the socket bone. I blended as I worked since I wasn't sure how well the Shiro eye shadow would blend. Honestly, this is maybe one of the easiest shadows I have ever blended with. It is so soft and so easy to work with... Sigh, it's the eye shadow that dreams are made of.

Using the small shadow brush again, I brought Chimera down under the eye on the outer half and brought Unforgettable down on the inside half.

I applied some winged liner (Stila Stay All Day Liquid Liner) and dusted Sweet Honey on the brow bone and the tear duct. I had to be careful with that shade since I messed it up a bit in my pressing extravaganza last night...

I filled in my brows just a touch with Espresso from Stila and then used my Chella brow gel over the top of that. I applied mascara on top and bottom lashes using Lancôme Hypnôse Star mascara.


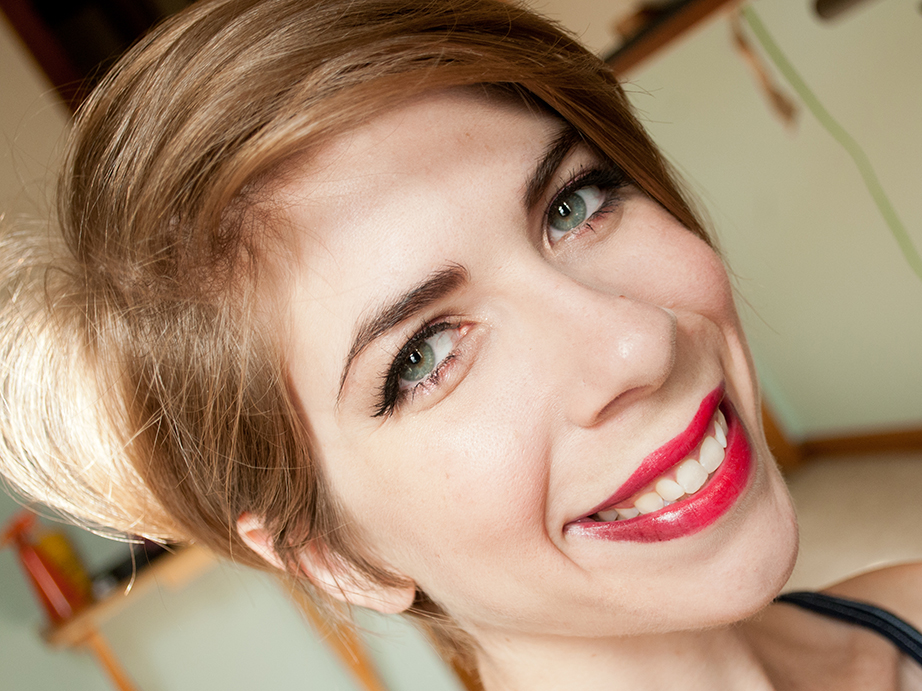
I finished off the look with very subtle blush and highlight and did a quick ombré lip using Bite Beauty lipstick in Pomegranate and a discontinued Smashbox Be Legendary lipstick (anything that is a dark wine will work). If you guys want, I can do a very quick video tutorial on how to do the ombré lip!
That's the look. If you have any questions or comments, feel free to leave them down below. More video tutorials to come as well... :D
Subscribe to:
Posts (Atom)