Monday, September 30, 2013

Sigma E25 Brush : Product review


I don't know how many of you who read my blog are also Redditors, but for those of you who are, you can probably skip this intro. For those of you who are not, let me fill you in on some makeup brush lore, if you aren't in the "know". One of the most talked about blending brushes is the MAC 217 brush and on Reddit, it's pretty much treated like a god. I do not own the MAC 217 because I have a really hard time spending money on brushes... which is stupid because quality brushes can make a big difference (quality, not price!). Since I didn't want to spend $24 and I've been really curious about Sigma's brushes, I decided to try their blending brush: the E25.

When I bought the E25 on September 12th, it was still $10, but looking at the Sigma website, it appears that it's now $12. I don't know the reason behind the price change, but that still puts it at 50% of the cost of the MAC brush. Again, I don't own the MAC 217, so this will be where the comparisons of the two end.

I've own crease brushes and some more precise blending brushes, but nothing quite like this. The brush looks like a paddle brush from the front, but from the side, it's fluffier. It is dense with bristles, but a bit longer than your standard shadow brush. You can definitely use this brush to apply shadow all over the lid as well as use it as a blending brush.


The quality of the brush seems fine. I haven't washed it yet, but I don't think that it should present a problem as I've never had any issues, even with cheap brushes. The bristles are incredibly soft and move with ease over the eye. I kind of dislike that the brush is white, just because it looks so dirty after using it even once.

And as for performance? Dear god, why did I wait so long to buy a brush like this? I feel like I've just opened to gates to makeup brush heaven and blending has become so freaking easy. I seamlessly blended out a shimmery, glittery taupe shadow today in like 3 seconds; it was magical. Every time I use this brush, it feels like magic. I'll still be using my other crease and blending brushes, but probably a lot less often as this guy is going to reign supreme. 

Final Verdict: Buy this. Seriously, if you do any sort of eyeshadow just buy the brush. It's incredibly affordable and it packs a punch; go for it!

Questions, comments? Let me know down below!

Thursday, September 26, 2013

Bloglovin'

I just joined Bloglovin', so if any of you faithful readers out there use this app to follow your blogs, you can add me now!

Face of the Day : Creme de Couture Collection


This is a FOTD and a continuation of the first impressions post yesterday. I used the eye shadows from the Crème de Couture palette for the first time today, so I have a few thoughts about them now. Scroll down to read more.


(p.s. I have no idea why there is an orange cast under my eyes. It's not there in real life!)

For my eye look today, I used Apricot Flower, Passion Fruit, and Café au Lait; Apricot flower is all over the lid, Passion Fruit in the crease, and Café au Lait in the outer corner and under the eye. I used NARS Smudgeproof primer with NYX Milk over that and then applied the shadow. Since Apricot Flower is one of the lighter shades in the palette, it did take a bit of patience to build up the color, but it stayed and smooth and not chalky through multiple layers of application. I only used Passion Fruit to blend the edges out a bit and to give a little depth to the crease; it makes a great, warm-toned blending shade that I can see my self using for a lot of looks. Café au Lait is much more pigmented and it only took a light application to darken the outer corner of my eye and only one brush stroke under the eye.

I used Cherry Apple on my cheeks, with a much lighter touch this time, and am a lot happier with the application. I applied several light layers of it to build it up to the shade that I wanted.

Questions, comments? Let me know!

Tuesday, September 24, 2013

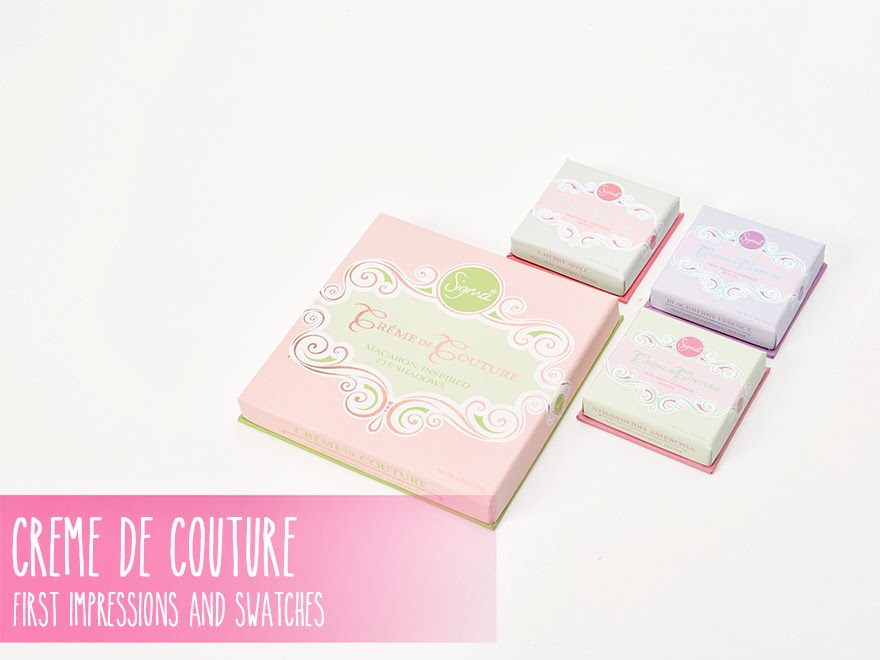
Sigma Crème de Couture Collection : First Impressions and Swatches


I ordered this about a week and a half ago and after being bounced around at the post office for 3 additional days, they finally delivered it late last week. I have never used any Sigma products, but the Crème de Couture collection really caught my eye. It's a collection of three blushes and a palette of 16 matte eye shadows. I've really been getting into matte eyeshadow, but it's insanely stupid how hard it is to find fun colors in a matte finish. Well, say hello to this palette. I also ordered a brush, but I will review that at a separate time.


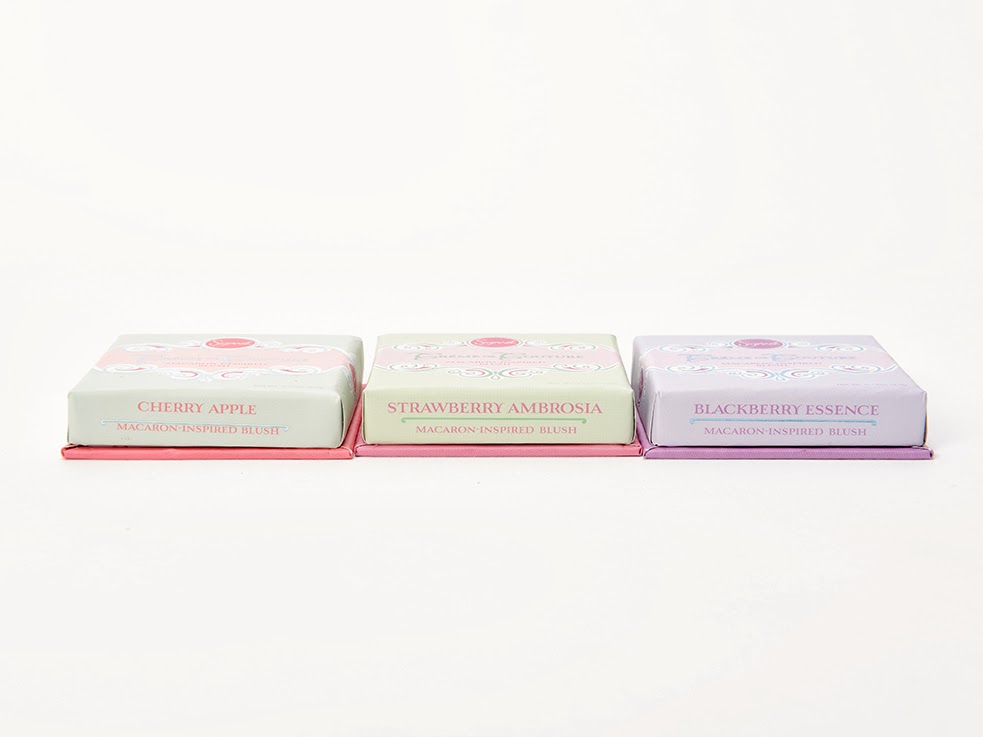
The blushes each come in their own little packaging and are .12 oz (each). I wasn't sure about Blackberry Essence since I've never owned a purple blush before... and I'm still not sure about it. I'm going to have to spend some time with that shade and figure out how to wear it in the most flattering way. If it comes down to it, I can always use it as a shadow rather than a blush. Cherry Apple is a very flattering, warm shade that falls somewhere between red and pink on the color spectrum. I've worn this shade and I was surprised at how pigmented it was on my face; I loaded my brush with product when I should have applied a little more sparingly. The blush is very soft feeling on the face, but not so soft that it's going to crumble in the pan. If you notice, I didn't swatch Stawberry Ambrosia and the reason I didn't is because I'm thinking of putting it in a giveaway... thinking of it.


For the record, I haven't used any of these shadows yet, they've only been swatched for the purpose of this post, so I can't report on how they wear. However, just like the blushes, they are incredibly soft on the skin, but not so soft that they'll crumble in the pan (if you don't know what I'm talking about, buy Kitten from Stila and you'll understand). I'm not too excited for the colors on the bottom row but that's only because I don't wear a lot of blue or green shadow, not because they aren't gorgeous. I see so much potential for all of these colors and I cannot wait to put them on my face! Some of the lighter shades aren't as pigmented as I might like, but they're still seem pretty solid.


As you can see, these bad boys swatch about a thousand times better on top of NYX's Milk Jumbo Pencil than they do on bare skin. I always wear a base or a primer when I wear shadow, so I'm confident that I'll get nice color payoff from these. Violet Whip and Cherry Blossom are the only two shades that seem to have a bit of trouble showing up, but I think that when applied to the eyelid, that they'll be very nice and subtle; probably great for blending like colors.

This whole collection retails for $55 (if purchased together) or $32 for the palette and $12 for each blush. You can check it all out at www.sigmabeauty.com if you're interested. If you have any questions about the collection, please let me know!

Friday, September 20, 2013

Rusted Over : Eye Tutorial


I know that I've done a lot of red toned eye makeup tutorials over the last few weeks, so after this one, I'm definitely going to take a little bit of a break from the red and venture into other colors for you guys. However, with Fall (or Autumn) just around the corner, I decided that this might be the perfect eye look to welcome it! 


As per usual, prime those eyes. I'm using NARS Smudgeproof Eyeshadow base.


I took a cream colored shimmery base and applied it all over my lid and all the way up to the brow bone. I also took a bit and smudged it into my tear duct. I used Maybelline Color Tattoo in Barely Branded.


I used Stila eyeshadow in Terracotta and applied it to the outer half of my eyelid.


And blended it out.


And brought it under the outer corner of my eye.


And then went under my eye with a shimmery taupe shade to help bring a little bit more definition. I also worked this into the crease a bit, which is hard to see, but it is there!


And then tightlined and added mascara to the top and bottom lashes.


And topped it off with a warm toned, basic pink on my lips. 

Quick and easy! If you have questions or comments, let me know down below!

Thursday, September 19, 2013

Beauty Box Roundup : September 2013


Welcome to the latest installment of Beauty Box Roundup! This is for the September 2013 and features the same three beauty subscriptions that I've been reviewing the past few months; Blush Mystery Beauty Box, Ipsy, and Birchbox. Please make sure to read to the end to see some changes that will be coming regarding this post.


Blush Mystery Beauty Box


What I received:

  • Pop Beauty Pouty Pop Crayon in Fuchsia Flirt
  • Anastasia Beverly Hills Clear Brow Gel 
  • Alterna Caviar Anti-Aging Dry Shampoo 
  • LVX Nail Lacquer in Midori 
  • Amlactin Triple Action Alpha-Hydroxy Therapy Foot Cream
  • Racinne Deluxe Travel Set
  • Brad Biophotonic Skin Care Ultra Peel


My Thoughts: Not the most exciting bag for me which is kind of a bummer after last's month not too exciting bag. There are some things that I'm excited about which would be the nail polish, since I have nothing in this color, and the Brad Ultra Peel, because I've been wanting to do a peel for a while. Everything else is kind of meh, much to my dismay. I'll probably end up trying the Racinne stuff in the winter when my skin needs more hydration (it's an anti-aging set) and I can always use dry shampoo, but I'm a little over stocked right now. The foot cream will be put to use (again, in the winter), but I don't see myself using the Pop crayon. I got one... two months ago (?) in an Ipsy bag and I hated it. I also received the Anastasia Brow Gel in an Ipsy bag and it's not my favorite, but will still get used.

Monetary Values

Pop Beauty Crayon: $4.16 (note on this: Blush puts this at $14, but it's only available in a 6-pack which retails for $25, so I refuse the $14)
Anastasia Brow Gel: $6.68 for .085 fl oz (full size: .28 fl oz/$22)
Alterna Dry Shampoo: $0.83 for .1 oz (full size: 2.65 oz/$22)
LVX Polish: $16 full size
Amlactin Foot Cream: $10 full size
Racinne Deluxe Travel Set: $65.83 (too many products on this one, but trust me)
Brad Ultra Peel: $25.74 for .25 fl oz (full size: 1.7 fl oz/$175)

Total Bag Value: $129.25


Ipsy

What I received:

  • Cailyn Tinted Lip Balm in Big Apple
  • NYX Single Eyeshadow in Purple
  • Elizabeth Mott It's So Big Mascara
  • J. Cat Fantabulous Lipstick in Honeycrisp
  • Starlooks Kohl Eye Pencil in Obsidian
My Thoughts: Remember last month when I said that I get one good month, followed by one bad month? Well, here's my bad month. I always feel like I need to explain myself when I say "bad month", because looking at the pictures above, you might not understand my frustration. For starters, I subscribe to these services to try new products and brands, not try the same brands over and over and over. I know that Birchbox is guilty of sending out items from the same brands, but I guess I don't mind as much when it's high end brands. There are several reasons I don't like this month's bag and here they are, 1) I've sampled all but one of these brands in my previous Ipsy bags, making the third or fourth time for some brands 2) Why did I get two lip products? and 3) An odd nude shade lipstick for someone who has their profile marked as fair? I'm getting really tired of seeing NYX and Starlooks and Cailyn and J.Cat. Seriously, this is not new or innovative by any means if you've already sent me products from them AND you sent them very recently. I also don't like the cheap factor that's starting to become very obvious with Ipsy.

Monetary Values:

Cailyn Tinted Balm: $19 full size
NYX Eyeshadow: $4.50 full size
It's So Big Mascara: $8.28 for 4 ml (full size: 10 ml/$19.99)
J.Cat Lipstick - $2.49 full size
Starlooks Eyeliner - $12 full size

Total Monetary Value: $46.27

If you want to subscribe to Ipsy, you can visit ipsy.com


Birchbox

What I Received:

  • Ruffian Nail Lacquer in Hedge Fund
  • uniqONE Hair Treatment
  • Benefit Sugarbomb Ultra Plush Lip Gloss
  • BGBGMAXAZRIA Bon Genre perfume
  • Soak Heel Foot Cream
My Thoughts: I feel kind of underwhelmed again this month with my Birchbox, but if you have read this far, you should be able to tell that I'm kind of underwhelmed in general with my subs. Again, even though the sample sizes are smaller, I am feeling this more than I am my Ipsy box and I will tell you why: non-repetition of brands and high end manufacturers. Even though I've received Benefit before, it's been a while since I've gotten them in a Birchbox and I haven't received any of the other brands before. One reason I'm a little underwhelmed by Birchbox is that I got a perfume sample and a foil... which I am not a fan of either. I prefer to get perfume samples with Sephora orders and I hate foil packets. Aside from that, my box is pretty good. Unfortunately, I already have Sugarbomb, so this one will be going into a giveaway later this month since it's actually a gloss that I enjoy. The hair treatment will definitely be used and I'm in love with the nail polish color; it's freaking gorgeous. (p.s. The perfume is actually decent smelling, but I still don't like getting them in my Birchbox)

Monetary Values:

Ruffian Nail Lacquer: $10 full size
uniqONE treatment: $1.06 for .3 fl oz (full size: 5.07 fl oz/$17.99)
Benefit Lip Gloss: $9.49 for .22 fl oz (full size: .51 fl oz/$22)
BCBG Perfume: $1.10 for .05 fl oz (full size: 3.4 fl oz/$75)
Soak Heel Foot Cream: $0.84 for 5 ml (full size: 60 ml/$10)
 
Full Monetary Value: $22.49

If you want to subscribe to Birchbox, you can follow my referral link here or visit birchbox.com

Now, for the "game changer"... I'm going to be stopping the Beauty Box Roundup after this month. As much as I enjoy doing this post, I have been really uninterested in my Ipsy bags, so I've cancelled the service. If I notice that they start to get amazing again, I might rejoin, but I don't know. I'm also cancelling my Blush box for the time being. I'm not disappointed in the service, but I have so many samples and beauty products that need to be used up, that I just can't keep up. I plan on going back to Blush in a few months when I've worked my way through some of the samples that I have now. Birchbox is going to be the only one that I will keep for the time being, so if you want to keep up with that, make sure to follow me on Instagram (link on the right side of the page) where I'll post my boxes. 

If you have any questions or comments, leave them down below!

Monday, September 16, 2013

L'Oréal Magic Nude Liquid Powder : Product Review


This is actually one of three drugstore foundations that I picked up to review for the blog several months ago; the other two can be found here and here and it is the one that I have had the hardest time bringing myself to review. Perhaps you can tell from that last sentence, but this foundation and I have not, do not, and will not get along. Keep reading to see what I disliked about this foundation, because even though it doesn't work for my skin, it doesn't mean that it won't work for yours!


The Facts

Price: $10.99 (this was at Target in Kansas, prices may vary)
Amount of Product: .91 fl oz.
Number of Shades: 12 - there are darker shades, but as per usual, they are limited
Claim: "Get the ultimate un-makeup look with Magic Nude Liquid Powder Bare Skin Perfecting Makeup with SPF 18. Revolutionary liquid transforms on contact, leaving a soft powder like finish. This foundation is so amazingly lightweight it's like wearing no makeup at all! Just shake and apply – it’s magic!"

Shade that I used: 312 Classic Ivory

Shades and the foundation itself: I decided to purchase this in 312 Classic Ivory, because 310 Light Ivory looked way too light in the store. Looking back, I kind of wish I had picked up 310 because it looks (online) to be more yellow, which is my undertone. Oh well, not horrible since this foundation is very thin. Yes, you read that correctly, the foundation is incredibly thin. It's a straight up liquid, not like any other liquid foundation you have probably ever used, this flows like water. It's actually very hard to control and makes application, which I'll touch on below, a bit difficult. It also smells like it has fragrance in it, but I can't find it on the ingredient list, so perhaps it's the alcohol in it. More on my skin's disagreement with this foundation later, but I think one of the biggest issues that my skin has with this foundation is that the first four ingredients are all silicones and alcohols, which isn't unusual when it comes to foundation, but it is unusual compared to the foundations that I use. All of my regular foundations have water as one of the first four ingredients.

Coverage: The coverage on this foundation is sheer to light depending on how much you apply. At a max, and I mean max, it would be considered light.

Application: The directions on the bottle state that you should apply this with your fingers and the L'Oréal website directly states not to use a brush or a sponge. That being said, I've applied this all of these ways and I completely agree with them, if you try to use anything other than your fingers, it immediately absorbs the product. The extreme liquid nature of the product makes it pretty difficult to apply. It says to pour some out, but I think that is quite possibly the worst idea of all time. I simply shook the bottle, tipped it over with my finger plugging the hole, and then took what ended up on my finger and applied it to my face. I worked it in immediately because this dries pretty quickly.

Wear Time: This is going to sound really goofy, but I have no idea. Since I could barely see this on my face, I'm not completely sure how long it wore.

Does it deliver on its claim? I will say that it does in fact deliver on its claim, but for me, it didn't work at all. It is very lightweight, it doesn't feel like you are wearing anything on your skin, and it does leave a soft powder finish... but I also can barely see this on my skin. I mean, I go over areas a few times to help "perfect" my skin. The description that they give is that it is a "bare skin perfecting makeup" and honestly, it's only a perfecting makeup if your skin is almost already perfect. This isn't going to cover up any dark spots, it won't cover any redness, and I don't think it does anything for your pores.


You can see in the pictures above, the areas of my skin that were already ok looking, have just been smoothed out a bit. For the third picture, I applied concealer on my blemishes, which is something I almost never do, because they were still so red looking (to be honest, my skin is overall really red looking right now due to whatever the hell is going on with my face). I shot this a few days ago and obviously, my skin is not happy, but I also wore this foundation when my skin was much, much happier. Even when my skin was behaving, I didn't like this foundation. I find that I have to wear it with a primer because otherwise my skin just turns into a huge oil slick a few hours after application. I used Hourglass's Mineral Veil in these photos and that helped the oil tremendously. 

And... since there is a high alcohol content to this foundation, it makes dry spots even drier or areas with flaky skin even flakier. If you have dry skin, this foundation is most definitely not for you.

Final Verdict: I'm pretty disappointed and bummed to have to write this, but I would say to avoid this foundation unless you already have fairly nice skin that is "normal" or only slightly oily. This has lighter coverage than any of my other foundations and that includes BB creams and tinted moisturizers. If you are looking for something very lightweight and with very light coverage, then this might be the foundation for you.

Questions? Comments? Let me know down below!

Wednesday, September 11, 2013

Ombré Lips : Tutorial


Remember when I did this the first time and said "If you want a tutorial, let me know!"? Well, here I am getting around to this tutorial. I decided to do this as a pictorial tutorial because the lighting is better than when I film with my janky 100 euro camera that I picked up in France 3 years ago. It's a very, very easy concept, but you need to make sure that you're using products that you're comfortable with. I'm showing you how to do this with reds, but you can use any shade to achieve an ombre. Light pink and dark pink would make an adorable combo! I, myself, would stay away from nudes since it would make me look like I just ate chocolate chip cookies and missed a few spots when wiping my mouth. Keep scrolling down to find out how to achieve this look!


First off, I line the center of my lips with a fairly true red lip pencil. You don't have to use anything fancy for this, just use whatever lip liner is your favorite. I'm using a Sephora brand liner, but I also love Jordana Easyliners (and they're something like $2.99 at Walgreens).


I then go in with my red lipstick, which for this tutorial is Kate Moss for Rimmel in shade 01, and apply it directly to my lips.


It's hard to tell the color difference here, but I went in on the outer corners of my lips with a slightly darker red liner. Yes, that's liner on the outer corners! This step is optional if you have a really bangin' dark wine colored lipstick (like... NARS Train Bleu). My wine colors lipstick can apply a bit patchy, so I do this to make sure that it won't show up like a blotchy mess.


I then apply my dark wine colored lipstick on the outer corners. I use a discontinued Smashbox Be Legendary lipstick, but anything lovely and dark will work.


And I blend it in. I usually just use my fingers, but if you don't want to do that, I would recommend something slightly fluffier than your typical lip brush. I use a cheap E.L.F. eyeshadow brush when I don't want to get my hands dirty.


And there it is! Questions, comments? Let me know down below!