

A lot of people stay away from bold colors when it comes to their makeup; some are scared to use it because they fear they'll look like a clown while others are simply conservative when it comes to color. I, however, fully embrace bright colors and think that they can be used very lightly for a pop of color or boldly for a more daring look. Follow the jump for a tutorial on two different looks using teal shadow.
Look 1

I've already done my foundation routine and a light blush and highlighter, which is what I would recommend for looks using bold colors. If you start using too many bold colors together, you're going to look like a stage performer. In my hand, I have Maybelline Color Tattoo in #40, Tenacious Teal, the #22 angled liner brush from the Sephora Professional Line, and They're Real mascara from Benefit. This is all you'll need for the first look. I find that with the Color Tattoo line, I don't need a primer, but if you have very oily eyelids, you may still want to use a primer.
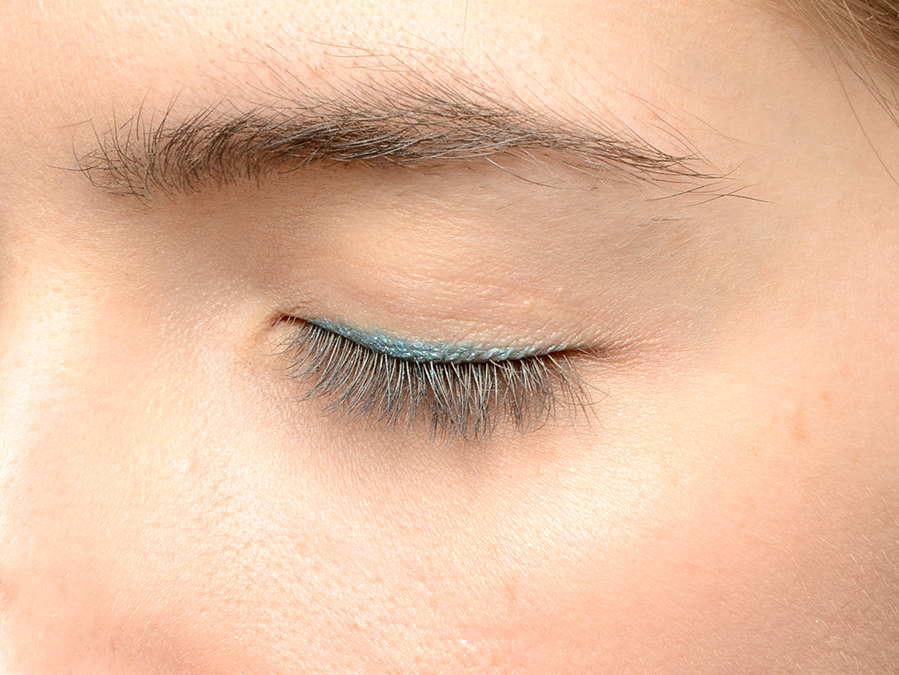
The first step is to apply a line of the teal shadow close to the lashline. I don't have very deep eyes, so I can get away with applying a thin line, but if you have more space between your lash line and the crease of your eye, go thicker.

Repeat on the other side. I added a bit more color so that you could actually see what I was doing.

This is a winged look so I thought I should show how I do winged liner. I draw a line from the outside corner of my eye and act like I'm going to extend it to the end of my eyebrow. The closer to your brow, the more dramatic your eyeliner will be. For an everyday look, I typically extend the liner to the top of my eye socket.

I have slightly fatty eyelids, so to help me in the process, I pull the skin above my brow taught. Keep in mind that if you use this method, your winged portion will look longer and return to its actual size when you release the skin.

I then draw a line from the top of the wing line and connect that with the original liner.

And then fill it in.

If you're not experienced with doing winged liner, it can be difficult at first to get your eyes to match. You have to realize that your eyes are probably not the exact same shape and therefore, you need to adjust the process for each eye. For example, my left eyelid is bigger, which means I make the liner on my right eye thiner so that the two match when my eyes are open.

Apply mascara! If you have difficulty with mascara residue on your upper lids, try looking down into a mirror. You can also pull the skin above your brows taught if you have eyelid skin getting in the way.

And there you have it, a very easy way to add a pop of color to your face. You can do this with any bold color, just make sure to apply a black mascara. The reason for the black mascara (versus a brown mascara) is that it creates separation between your eye and the bold color. For this look, it's not as important because the teal is mildly dark, but if you were to recreate this look with... hot pink, you would want that line of black.
Look 2

To do look two, we can just build off of look 1. My first step was to extend the wing on my eyeliner.

I've created a guideline for the area that I am going to fill in. If you're nervous about making mistakes with a bold color, try doing this and it should make you feel more at ease. Also, if you want a more graphic eyeliner look, stop here and you have a whole new look.

I used my fingers to fill in the space that I had lined. If you're not comfortable with that, just use the eyeliner brush to fill in.

This look requires more products than look one and we'll be delving into powder shadows. This is a BH Cosmetics powder shadow #14 from the cool shimmer series.

Using a small eyeshadow brush (I used a #15 from the Sephora Professional line), press the lime shadow into the first half of your eyelid.


I also used three shades from the Wet 'N Wild "Sparkle 'Til Morning" palette (this palette was limited edition and is no longer available).

Using the teal shade (#2), I added a bit more color into my crease so that things looked a bit more cohesive.


I then took the dark brown shade (#1) and pressed it in along the the winged portion.

Using the same shade, apply it to the outer third of your crease. You want these two lines to create a V shape.

And then blend! You can blend as much as you want for this step, it just depends on what look you want to achieve. I wanted to keep as much teal as possible, so I blended mostly on the outer corner. If you find that you've blended too much and certain colors have disappeared, simply take your small eyeshadow brush and press the color back in. You don't want to "sweep" it on, you want to press.
I then took the light gold shade (#3) and applied it to the inner corners and my brown bone.

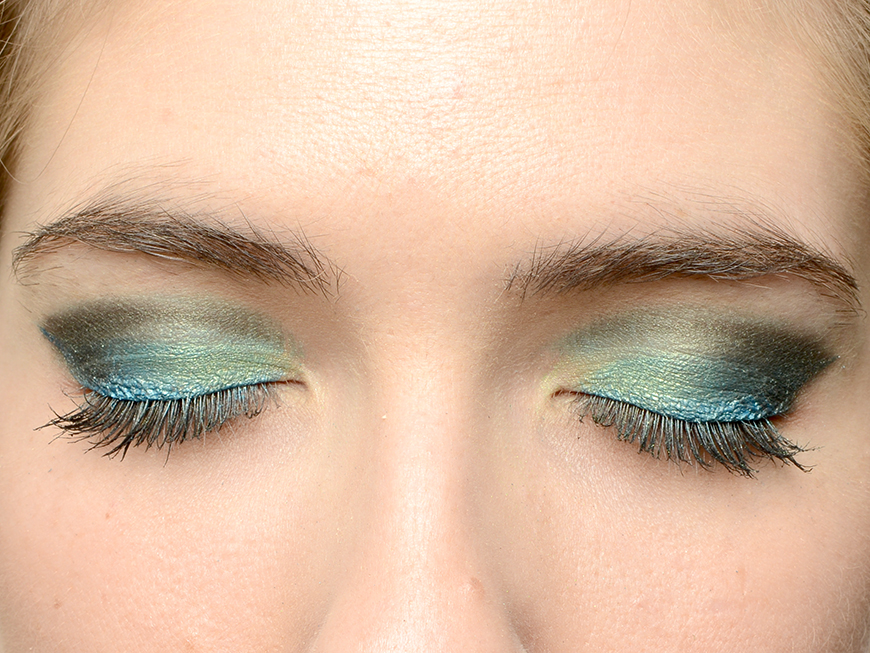
Here are the eyes open. I've also filled in the sparse areas of my brows with a pencil and then use Chella eyebrow gel to keep the unruly bastards in place. You can leave the makeup alone at this point if you aren't into lipstick, just apply a gloss or a lip balm and go on your merry way.

I want to apply a lipstick though, so I first lined my lips with a very neutral lip liner. I use Jordana Easyliner in Tawny. It's a very good match for my lip color and it's something like $3; doesn't get much better than that.

And then I applied Costa Chica by Mac to my lips. I realize that my lips look fairly yellow in these pictures, but I want to tell you that it has nothing to do with the lipstick. I have the white balance set to be a bit warm, which makes my teeth look fairly yellow (they're not pristinely white anyway).

So there you go. Two looks with teal shadow; one is very simple and one is a bit more complex. Which look do you prefer?
(All photos copyright Allison Richardson Photography and not available for use without permission)
No comments:
Post a Comment